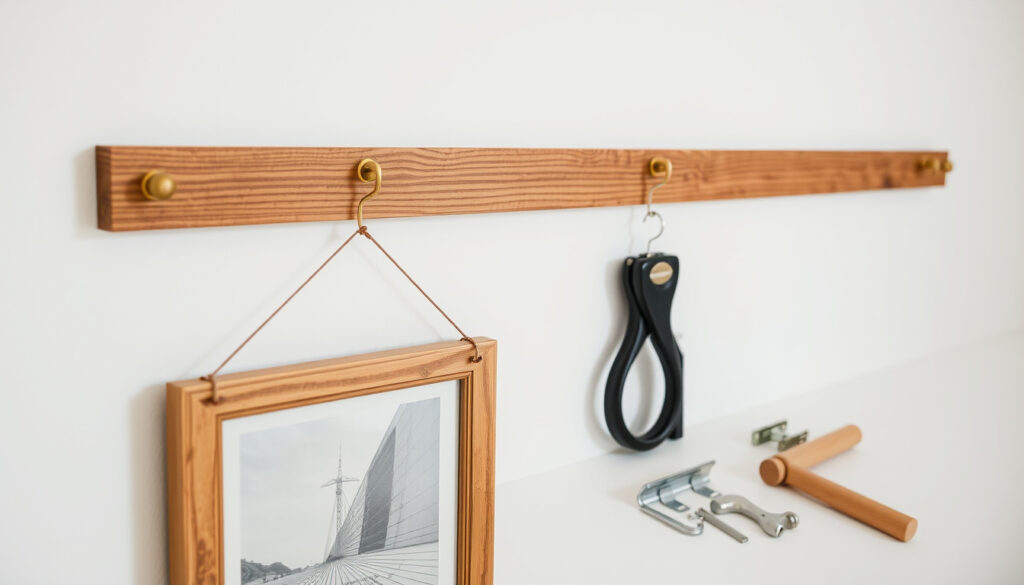
Picture Rail: Purpose, Installation, and Alternatives
Few home features make wall art as effortlessly changeable as a picture rail. If you’ve ever patched a dozen nail holes after rearranging a gallery wall, this century-old idea offers a clean break. So whether you’re restoring a Victorian terrace or renting a modern flat, here’s a practical look at picture rails—how they work, how to install them, and what alternatives exist today.
Installation time for a single room: 2–4 hours ·
Typical picture rail height from floor: 12–18 inches (30–46 cm) below ceiling ·
Average cost per linear foot (DIY): $1–$3 ·
Common wood type used: Red Deal / Pine ·
Weight capacity per single wall hook: 10–15 lbs (4.5–6.8 kg) ·
Traditional width of a picture rail: 2–3 inches (5–7.6 cm)
Quick snapshot
- Picture rails allow art to be hung without damaging walls. (DIYdata – UK carpentry guide)
- They are placed near the ceiling, typically 12–18 inches (300–500 mm) below it. (DIYdata; Skirting World – moulding specialists)
- Whether picture rails visually expand a room – only anecdotal claims exist. (DIYdata)
- Exact load capacity for homemade hooks is unverified; commercial steel hooks are rated 10–15 lbs. (DIYdata)
- 1837–1901: Picture rails become widespread in Victorian homes for hanging art without damaging plaster. (Little House On The Corner – DIY blog)
- 2000s–present: Revival driven by historic renovations and renter‑friendly hanging solutions. (Little House On The Corner – DIY blog)
- Demand for flexible, damage‑free art hanging continues to grow among renters and homeowners alike. (Little House On The Corner)
- Hybrid systems combining picture rails with wire tracks are gaining popularity. (Little House On The Corner)
Five key facts about picture rails, drawn from UK installation guides and historical sources.
| Fact | Value |
|---|---|
| Origin | Victorian era (1837–1901) |
| Typical Placement | 12–18 inches (300–500 mm) below ceiling (DIYdata) |
| Common Material | Pine, Red Deal, MDF |
| Hook Type | Galvanized steel or brass picture rail hooks (Skirting 4 U – moulding retailer) |
| Average Cost per Linear Foot | $1–$3 (moulding only) |
What is the point of a picture rail?
Hanging art without wall damage
- Picture rails use hooks that grip the moulding, so no nails or screws enter the wall. (DIYdata – UK carpentry guide)
- This makes them ideal for rented properties where wall damage is prohibited. (Little House On The Corner – DIY blog)
Flexibility to rearrange artwork
- Hooks slide along the rail, allowing you to move pictures without patching holes. (Skirting World – moulding specialists)
- You can change the gallery layout in minutes, unlike traditional nail‑based hanging. (Little House On The Corner)
Protecting historic plaster walls
- Victorian and Edwardian homes often have decorative plaster that cracks easily – picture rails prevent this. (Little House On The Corner)
- Modern drywall also benefits because the rail distributes weight across several fixings. (DIYdata)
For renters and owners of older homes, a picture rail eliminates the need to patch and repaint after every art change. The trade‑off: installation requires drilling into the wall, but once the rail is up, the hooks never touch the plaster.
The implication: a picture rail is a one-time fix that pays for itself in saved wall repairs over the years.
What is the difference between a dado rail and a picture rail?
Position on the wall
- Picture rails sit near the ceiling – 300–500 mm below it. (DIYdata)
- Dado rails are placed at chair‑height, typically 900–1,000 mm from the floor. (MR Mouldings – interior trim supplier)
Function and design purpose
- Picture rails provide a mounting point for art hooks; they are functional, not decorative. (Skirting World)
- Dado rails protect walls from chair backs and furniture bumping; they are primarily protective and ornamental. (MR Mouldings)
Typical dimensions and profiles
- Picture rails are usually 2–3 inches (50–75 mm) wide, with a simple rounded profile. (Skirting World)
- Dado rails are wider (3–5 inches) and often feature more ornate profiles. (MR Mouldings)
Two rails, two jobs. The picture rail hangs; the dado rail protects. Placing the wrong one in the wrong spot can throw off a room’s proportions.
What this means: understanding the distinct roles of each rail prevents costly installation mistakes and ensures the trim serves its intended purpose.
What to use instead of picture rail?
Modern alternatives: wire systems and adhesive hooks
- Wire picture‑hanging systems (ceiling‑mounted tracks) are easy to adjust and require no wall fixings. (Little House On The Corner)
- Adhesive hooks (e.g., Command strips) work on smooth painted walls but may fail on textured surfaces. (Skirting 4 U)
Traditional alternatives: crown moulding and plate rails
- Crown moulding is decorative but not designed to hold hooks; using it for hanging can damage the profile. (Skirting World)
- Plate rails (shelves with a lip) can display art but take up vertical wall space. (MR Mouldings)
Pros and cons of each alternative
- Wire systems: highly flexible but visible ceiling tracks can be intrusive.
- Adhesive hooks: damage‑free removal, but weight limits (usually 4–5 lbs) restrict use. (Skirting 4 U)
- Plate rails: attractive and functional, but deeper profiles collect dust.
Adhesive hooks are marketed as “no‑damage” but can peel paint on textured walls. Wire tracks require a ceiling‑mount and may not suit all room layouts. Picture rails remain the most discreet load‑bearing solution for art.
The pattern: each alternative trades off between visual intrusion and load capacity, while picture rails strike a practical middle ground.
Is it hard to install a picture rail?
Tools and materials needed
- Stud finder, spirit level, miter saw, construction adhesive, and 2‑inch finish nails. (Little House On The Corner)
- Pre‑primed picture rail moulding (pine or MDF) in lengths matching your wall runs. (Skirting 4 U)
Step‑by‑step installation process
- Measure and mark the height (300 mm below the ceiling for standard 8‑foot ceilings). (Skirting 4 U)
- Use a spirit level to draw a continuous line around the room. (MR Mouldings)
- Cut the moulding to length with 45° miter joints at internal and external corners. (Little House On The Corner)
- Apply adhesive to the back and press the rail into place, then secure with finish nails every 500 mm (about 50 cm). (Little House On The Corner)
- Fill nail holes, sand, and paint. (Skirting 4 U)
Common mistakes and how to avoid them
- Not using a spirit level: walls can be uneven; a level line prevents a crooked rail.
- Skipping adhesive: nails alone can cause the rail to bow over time. (MR Mouldings)
- Cutting without accounting for joint gaps – always dry‑fit before gluing. (Little House On The Corner)
How to make your own picture rail?
Materials: pre‑cut moulding vs raw lumber
- Hardware stores sell pre‑primed picture rail moulding in standard profiles (Red Deal, pine, MDF). (Skirting 4 U)
- Alternatively, you can use 1×3 or 1×4 pine boards, but you’ll need to router a profile. DIYdata advises that round‑over bits create a professional look. (DIYdata)
Cutting and joining corners
- Always use 45° miter cuts for clean corner joints. (Little House On The Corner)
- For walls that are out of square (common in older homes), coped joints (cutting one piece to follow the profile of the adjoining piece) give a tighter fit. (MR Mouldings)
Finishing and painting
- Prime the moulding before installation to avoid brush marks on the wall. (Skirting 4 U)
- Use a semi‑gloss or satin paint for easy cleaning – picture rails collect dust from art chains. (Skirting World)
Six key differences between picture rails and dado rails – height, function, and dimensions are the easiest ways to tell them apart.
| Feature | Picture Rail | Dado Rail |
|---|---|---|
| Height from floor | Near ceiling (12–18 in.) | 950–1,100 mm (3–4 ft) |
| Purpose | Hang art | Protect walls from furniture |
| Typical width | 2–3 in. | 3–5 in. |
| Profile style | Simple, rounded | Ornate, flat often |
| Installation difficulty | Moderate – requires miter cuts | Similar to picture rail |
| Cost per linear foot (UK) | £1–£3 | £2–£5 |
The pattern: the comparison table shows that while installation difficulty is comparable, the purpose and placement of each rail type define its role entirely differently.
Installation checklist for a weekend project
- Measure the room perimeter and buy 10% extra moulding.
- Mark a level line 300 mm below the ceiling (use a laser level for speed).
- Cut mitered corners and dry‑fit before any adhesive.
- Glue and nail at 500 mm intervals – check for level as you go.
- Fill nail holes, sand, then apply two coats of paint.
- Install hooks and hang art – allow 24 hours for adhesive to cure. (Little House On The Corner)
Timeline: from Victorian standard to modern revival
- 1837–1901: Picture rails become a standard feature in Victorian homes, allowing families to display art without damaging decorative plaster. (Little House On The Corner)
- 1920s–1940s: Usage declines as modern hanging systems (nails, adhesive hooks) and central heating reduce the need for mouldings. (Skirting World)
- 2000s–present: Revival through historic home renovations and the rise of renting. Landlords are more likely to approve a picture rail than dozens of nail holes. (Skirting 4 U)
Every generation wants to hang art without damaging walls. Picture rails solved that in the 1800s, and they’re solving it again today for renters and heritage homeowners.
What we know and what remains unclear
Confirmed facts
- Picture rails let you hang art without nails or screws. (DIYdata)
- Standard placement is 300–500 mm below the ceiling. (Skirting World)
- Installation takes 2–4 hours for an average room.
What’s unclear
- Whether picture rails make a room feel bigger – no controlled studies exist.
- Exact load limits for homemade hooks – only commercial hooks have published ratings.
Quotes from the industry
“Picture rails are an efficient and flexible way of hanging art – you can change the entire look of a room without touching the walls.”
Carlos Garcia, interior designer (Little House On The Corner)
“A picture rail is a rail that runs close to the top of the room, used for hanging pictures with hooks and chains.”
Lick paint company blog (Skirting World)
Two perspectives, one message: picture rails are a simple, low‑impact solution that suits both historic and modern interiors.
Summary
Picture rails are not just a Victorian relic – they’re a practical, damage‑free system that fits today’s renting and art‑loving lifestyle. For UK homeowners with older properties, the choice is clear: install a picture rail once and rearrange your gallery wall forever without patching a single hole. For renters, the same logic applies – a rail approved by the landlord means no more dubious blue tack or peeling adhesive strips.
mdfskirtingworld.co.uk, whingewhingewine.co.uk, intrimmouldings.com.au, reddit.com, coveryourwall.co.uk, llcompany.co.uk, youtube.com, notiziepunto.it
For a deeper look at installation methods and material choices, see this comprehensive picture rail guide.
Frequently asked questions
Can I install a picture rail on drywall without studs?
Yes – toggle bolts or heavy‑duty drywall anchors can support the rail. For best results, attach at least every 500 mm into a stud or use a strong adhesive. (Little House On The Corner)
What type of hooks do I need for a picture rail?
Galvanised steel or brass picture rail hooks that hook over the top edge of the moulding. They come with a loop or ring to attach chains. (Skirting 4 U)
How much weight can a picture rail hold?
Commercial hooks are rated for 10–15 lbs (4.5–6.8 kg) each. The rail itself, when properly attached to studs, can support significantly more – but hook integrity is the limiting factor. (DIYdata)
Do I need a professional to install a picture rail?
If you’re comfortable with a miter saw, level, and basic measuring, it’s a weekend DIY job. Expect 2–4 hours for an average room. (Little House On The Corner)
Can picture rails be painted?
Yes, and they should be primed before installation. Use the same colour as the wall for a discreet look, or a contrasting shade to make the rail a design feature. (Skirting World)
Are picture rails suitable for modern homes?
Absolutely. Many modern interiors use picture rails as a subtle moulding detail that also serves a function. Their clean lines work well with minimalist and contemporary decor. (Little House On The Corner)
More related posts
 Daniel Kaluuya: Career, Net Worth, and Why His Eyes Are Red
 Emile Heskey: Age, Height, Wife, Net Worth & Career Stats
 Christopher Hitchens: Bio, Cause of Death, Famous Quotes
 Ellis Howard: Actor, Career, and Namesakes Explained
 Rosie Huntington-Whiteley: Age, Children, and Jason Statham
 Jennifer Coolidge: Her Net Worth, Voice & Emmy Win
 Steve Davis: Net Worth, Wife, and DJ Career
 Charles Rennie Mackintosh: Life, Works & Legacy
